[ AWS ] 用 Lambda 與 Python 建置縮圖服務
15 Aug 2019
架構說明
服務架構圖
 當 User 從 CloudFront 讀取圖片時:
- 從 CloudFront 取 Cache,當 Header 中的 x-cache 為 Miss from cloudfront 往下走到 API Gateway
- API Gateway 會帶進 Lambda 透過 IAM Role 找 Target Bucket 的已轉好的圖片,回傳給 API Gateway 走原路回傳給 User
- 若是找不到圖片會再透過 IAM Role 找 Source Bucket 的原始圖片做 Thumbnail 後,存進 Target Bucket 並走原路回傳給 User
Step 1 - 創建 S3 儲存桶
假設 Source bucket 已經存在,我們還需要一個 target Bucket 來放已轉好的圖片
在 S3 console 點擊 Create bucket
Step 2 - 創建 Lambda function
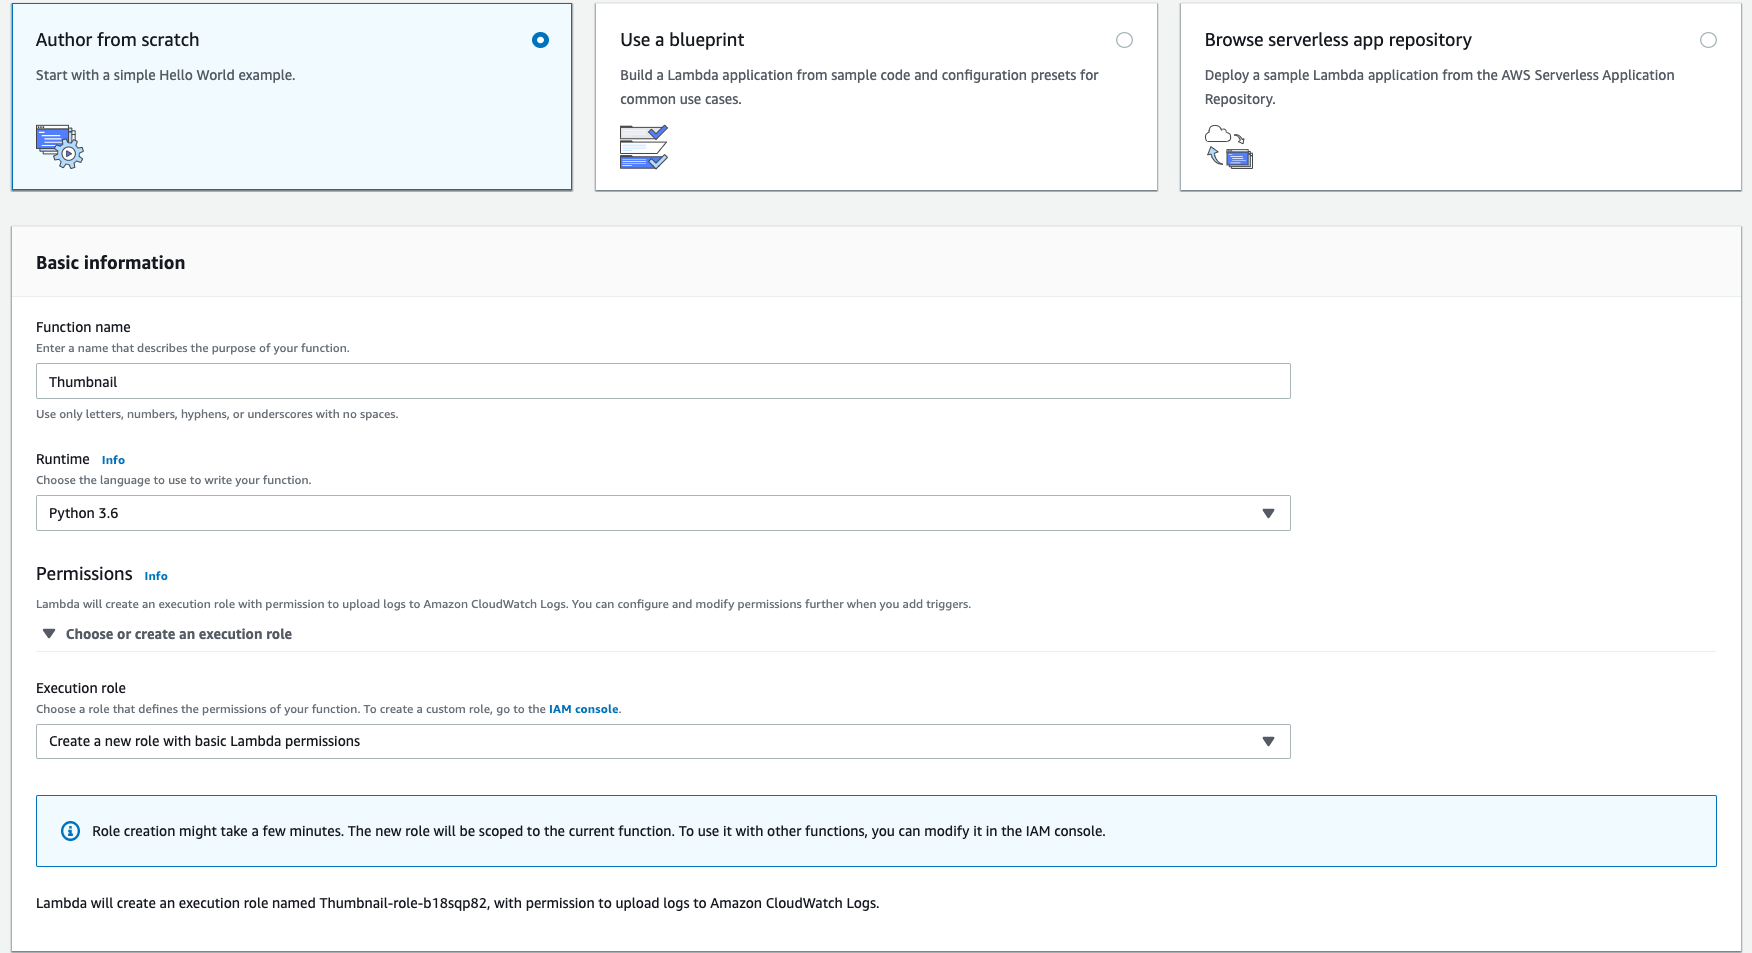
- 在 Lambda console 點擊 Create function
- 輸入你的 Function name
- Runtime 選擇 Python3.6
- Permission 選擇 Create a new role with basic Lambda permissions
- 上面的步驟做完點擊 Create Function
Step 3 - 創建 Role
Role 是 IAM 底下負責的服務,把需要的 policies 集合再一起,再由其他 AWS Service 來 attach 它 此時我們需要的是 S3 的讀寫與 CloudWatch Log 的 policies
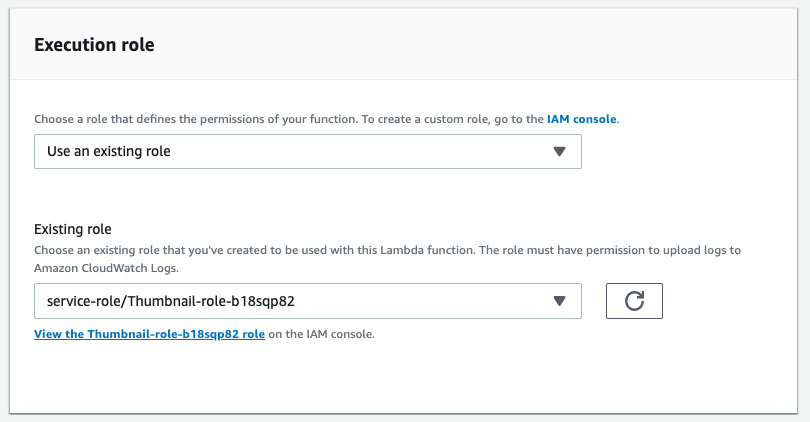
- 在上個步驟做完後到這個 Lambda Function 內找到 Excution role
- 點選這區下方的連結 View xxxxx role on the IAM console 進去設定 Role
- 點擊 Attach policies
- 此頁為 Attach Permissions 等等會用到,點擊 Create policies
- 點選 JSON 將以下代碼貼上,要記得改掉 YOUR_BUCKET_NAME
{ "Version": "2012-10-17", "Statement": [ { "Effect": "Allow", "Action": [ "logs:CreateLogGroup", "logs:CreateLogStream", "logs:PutLogEvents" ], "Resource": "arn:aws:logs:*:*:*" }, { "Effect": "Allow", "Action": [ "s3:PutObject", "s3:GetObject" ], "Resource": "arn:aws:s3:::YOUR_BUCKET_NAME/*" } ] } - 點擊 Review policies
- 確認無誤,輸入 Policy Name 後,點擊 Create policies
- 回到 Attach Permissions,在搜尋欄打上剛剛建立的 Policy Name,打勾該項目後點擊 Attach policy
做完以上步驟就賦予 Role 擁有 Bcuekt 的讀寫與 Log 寫入的權限了
Step 4 - 創建 API Gateway
回到 Lambda function 的 console,我需要建立一個觸發 Lambda 的觸發點
因為要放上網站使用,所以我採用 API 的方式觸發
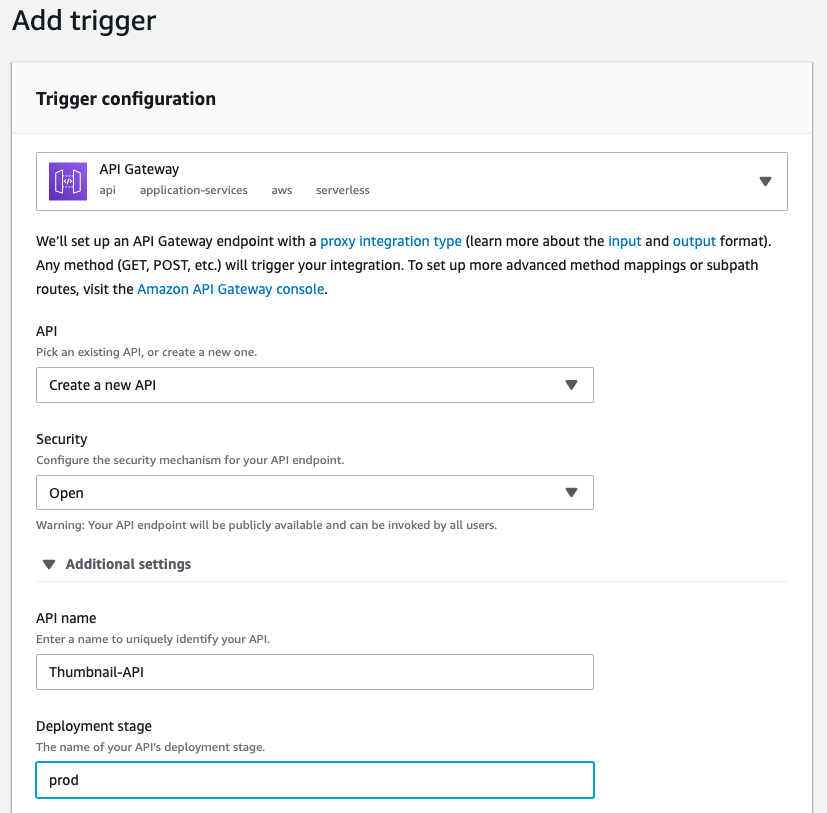
- 點擊 Add Trigger
- 選擇 API Gateway
- API: 選擇 Create a new API
- Security: 選擇 Open
- 點擊 Additional settings 展開細項設定
- API name 跟 Deployment stage 都可以自行設定成想要的名稱
- Binary media types 設定為 */* 註: 因為我這支 API 只會丟圖片不會做額外的事情,若是有其他需求也可以設定為 image/jpeg 或是 image/png
- 點擊 Add 後,再到 Lambda function console 內,可以看到產好的 API url
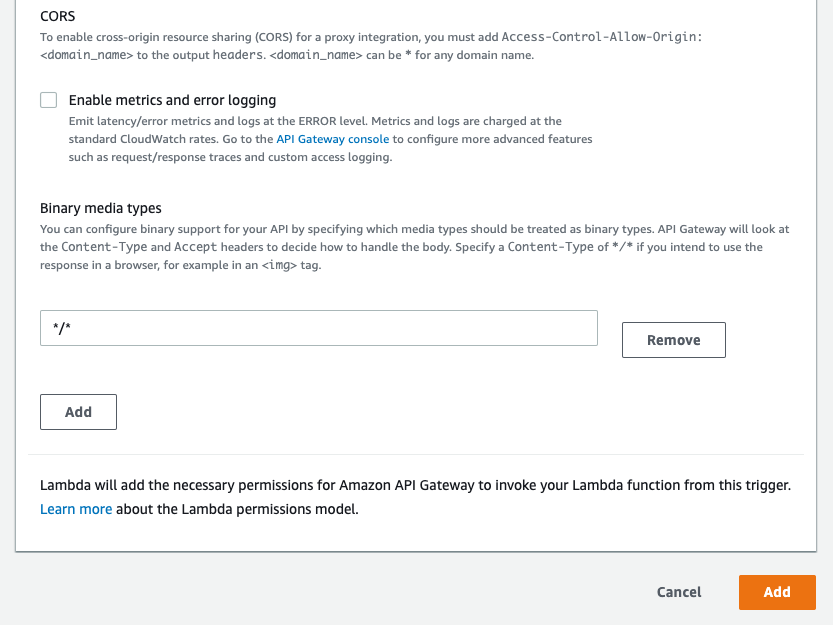
如果有任何 API Gateway 設定要更改的,一定要到 API Gateway 的 console 內,找 Resource 點擊 Actions
選擇 Deploy API,有手動部署過,設定才會成功!
Step 5 - 上傳 Function Code
在執行此步驟前請到這邊下載我寫好的 lambda_function 並包成一個 zip
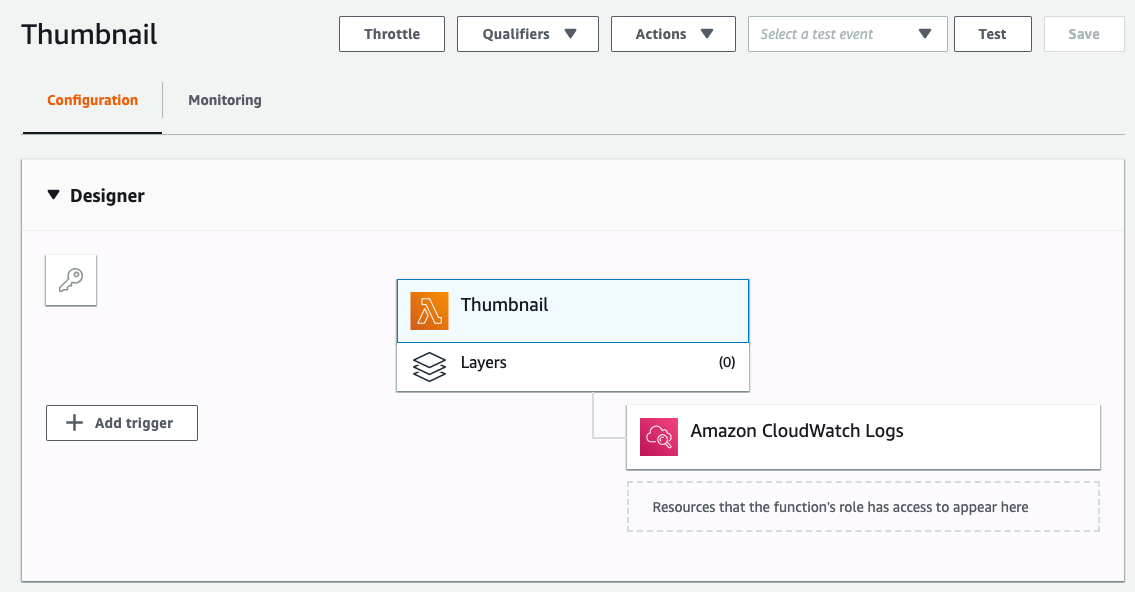
- 點擊 Designer block 內最上面的個 Lambda 標誌
- 正下方的 Function Code block 內,Code entry type 選擇 Upload a .zip file
- 將剛剛包好的 zip 上傳後,點擊右上角的 save
Step 6 - 基本設定
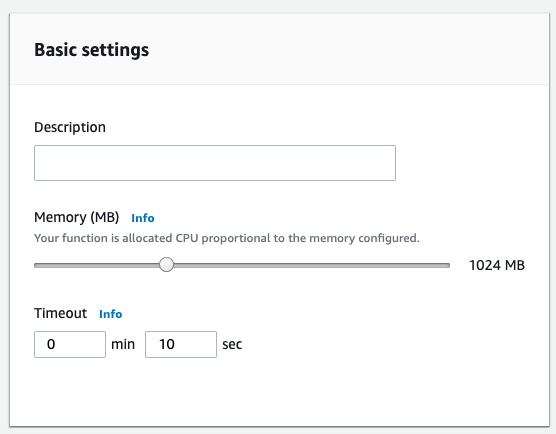
在 Function Code block 下面找到 Basic settings block
做這件事情的目的是轉圖,圖片有大有小,因此,我們把 Lambda 可以用的 Memory 提高到 1024MB
Timeout 10 秒,因需求而斟酌設定,如圖
Step 7 - 設定參數

在 Function Code block 下面找到 Environment variables block ,設定如上圖 關於這支 Function 的使用說明與 Source 在這裡
參數說明如下,符號 * 為必要設定
- *SIZECHART - Split with ‘,’. ex: 300x300,100x100…
- *SOURCE_BUCKET - Your source image s3 bucket.
- SOURCE_PREFIX - Your source prefix path.
- *TARGET_BUCKET - Your target s3 bucket.
- TARGET_PREFIX - Your target prefix path.
- SOURCE_REPLACE - If your source is a url, You can paste a domain & ‘/’ to replace it without ‘http://’ or ‘https://’.
設定完成後,點擊右上角的 save 才算完成
Step 8 - 設定 CloudFront 注意事項
- Origin Path: 輸入剛剛在建立 API Gateway 的 Deployment stage,Ex: “/prod”
- Behaviors: Cache Based on Selected Request Headers,要選擇whitelist
- Whitelist Headers: 要允許Accpet與Authorzation通行。


